EDIT: I have changed the recipe below with slightly with a new, improved version.
My family has complained more than once that I will make something tasty and then never make it again because I am on an endless quest to improve my baking or just get distracted with wanting to try turn new ideas into something tasty on a plate and so don’t find time to just stick with and remake previous foods that have been well-received. Vanilla cake is a perfect case in point. I posted a vanilla cake recipe on here not that long ago. But it wasn’t the vanilla cake that I had in my head and wanted for my birthday cake a little while ago. For my birthday cake I had a few requirements – I wanted oil in it to help it keep better as it is easier to make a cake the day before I decorate it, I wanted a rich buttery flavour, I wanted brown sugar for its taste and hygroscopic properties (attracts moisture and so helps GF cakes stay moist rather than disappearing too quickly into a mound of dusty crumbs) and white sugar because it seems to make cakes a bit lighter, I wanted lots of eggs because they seem to help cake flavour and texture, I wanted to continue testing my theory that GF cakes don’t need gums to turn out beautifully. Only three cakes later (I really need to find some people to share my baking with before I reach the point of needing new, and bigger, clothes!) this cake was the result. In the interests of full disclosure, I do need to say that this cake is best on the day it is made and definitely needs to be stored in an air-tight container as soon as it has cooled down. But then again, my (increasingly distant) memory of gluten cakes is that they too are best when fresh and I’d say this cake is just as nice on day 2 or 3 as a gluten cake.

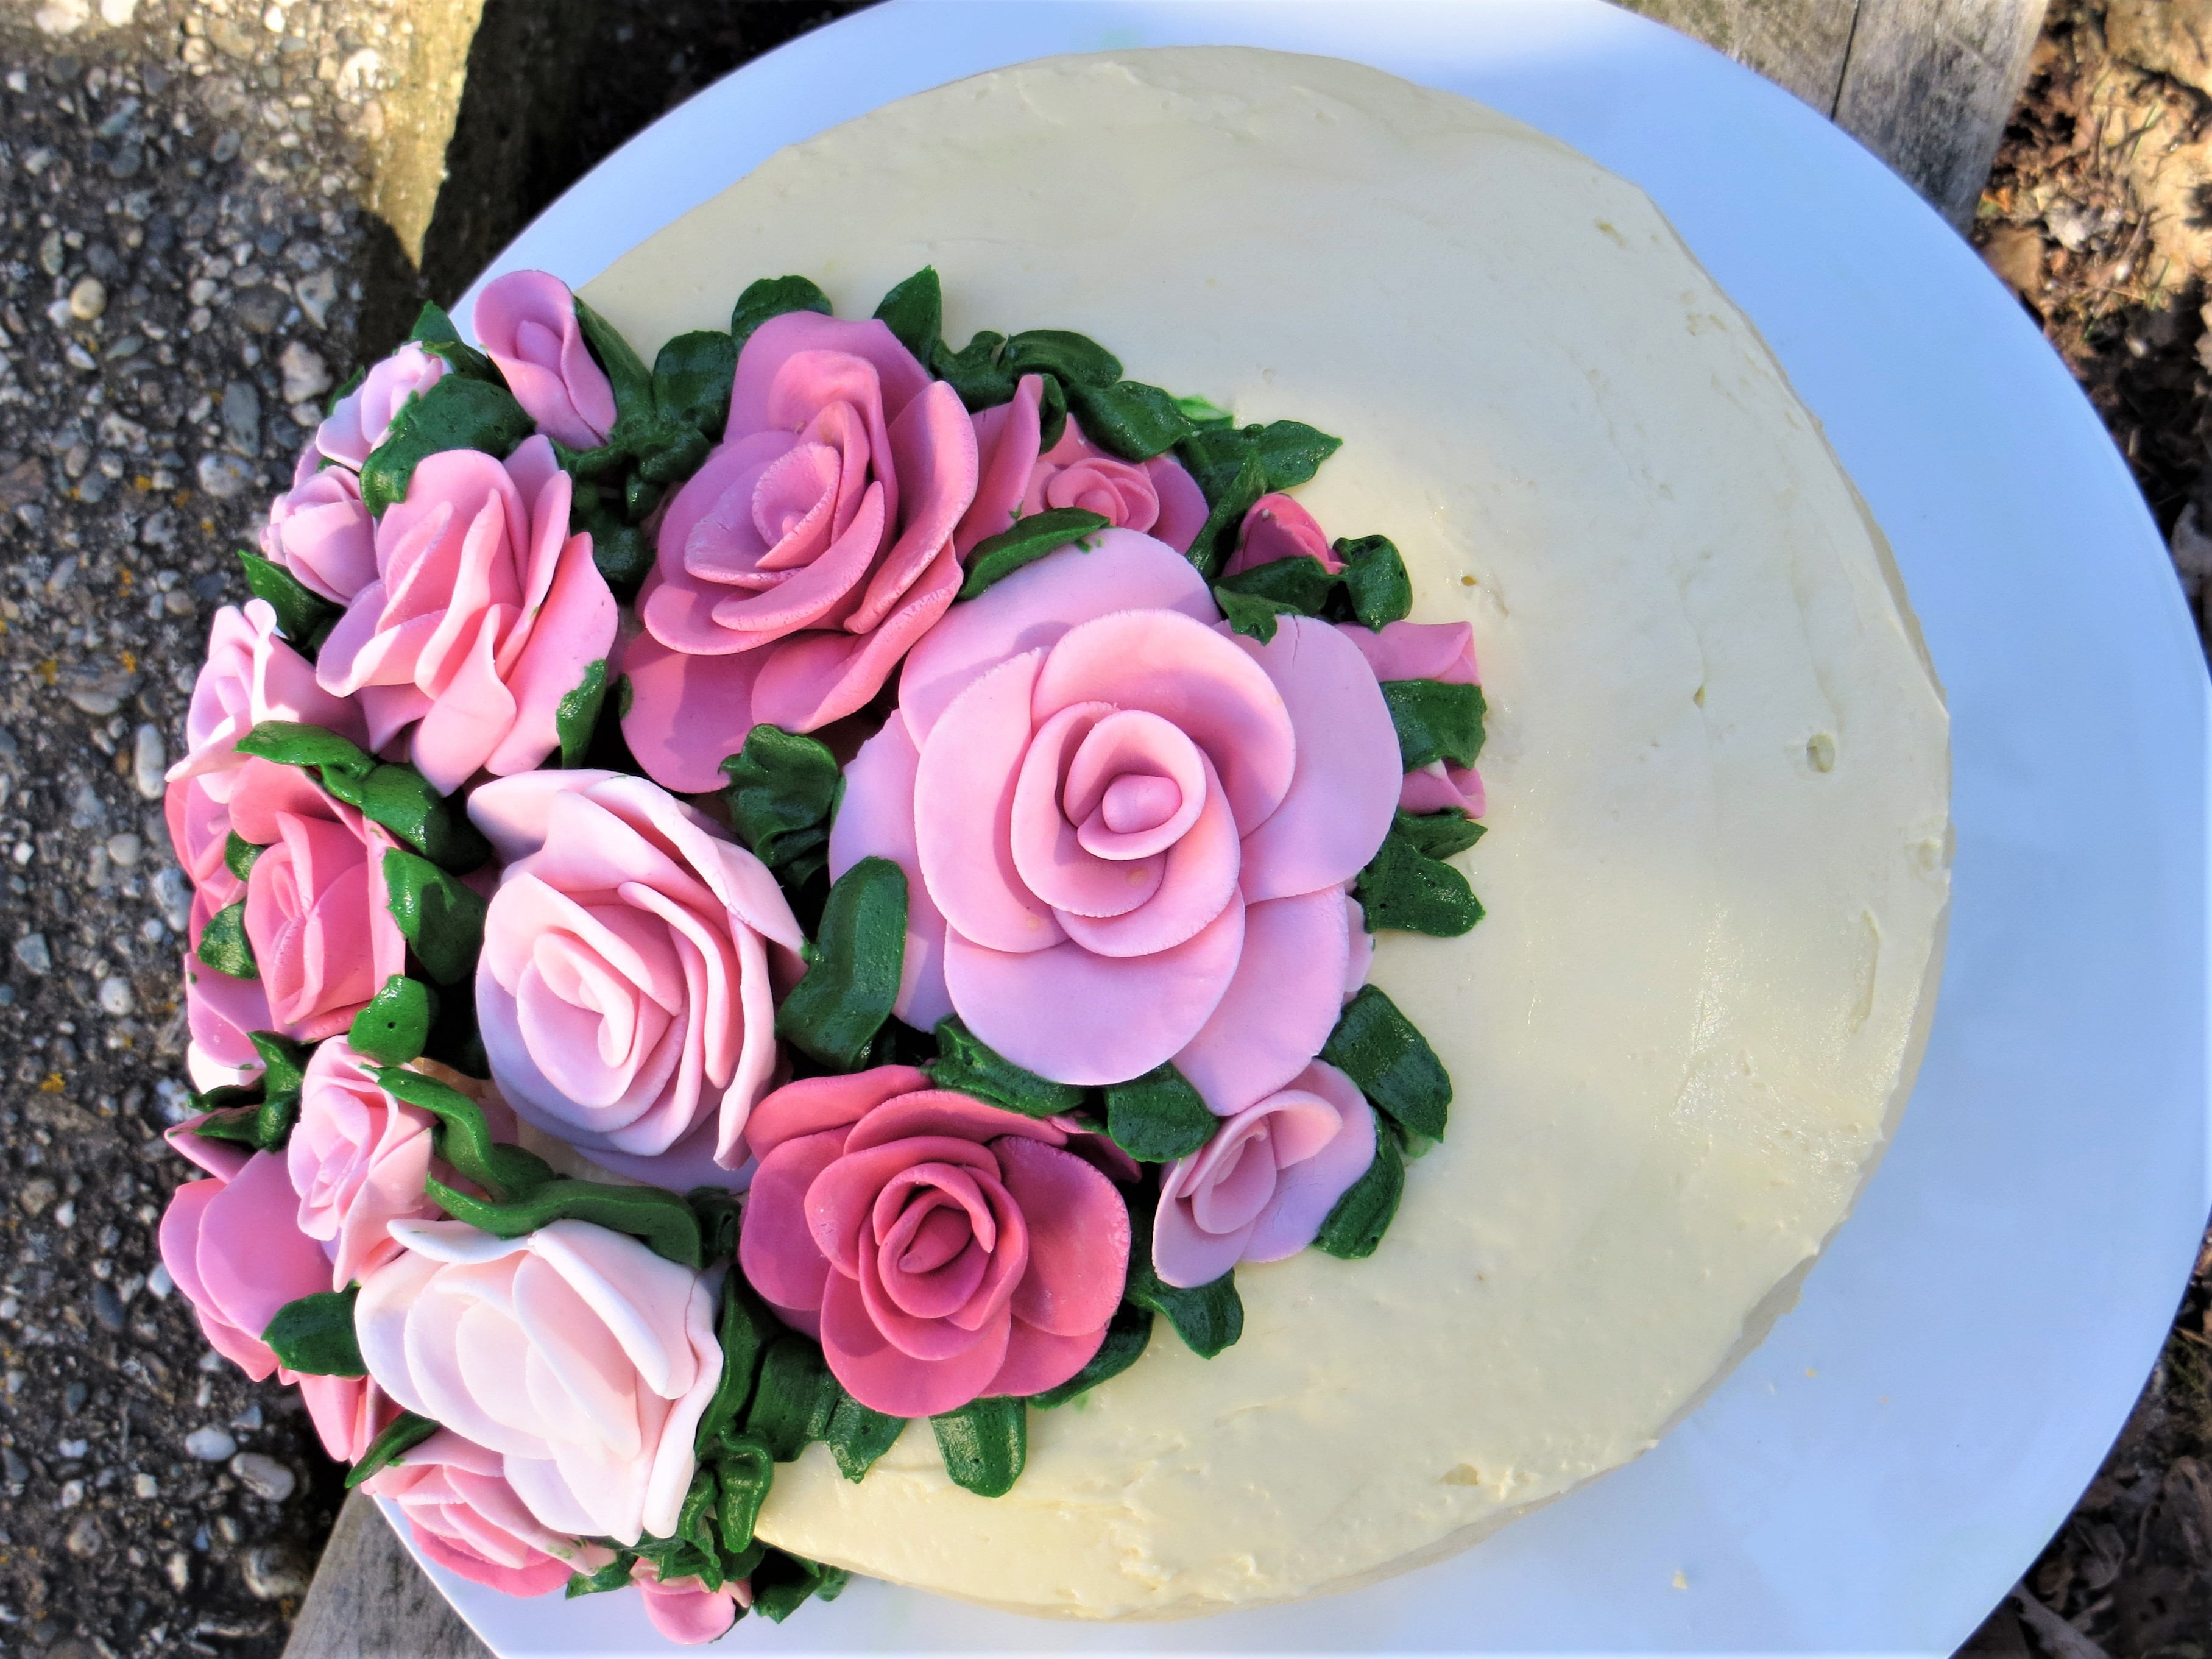
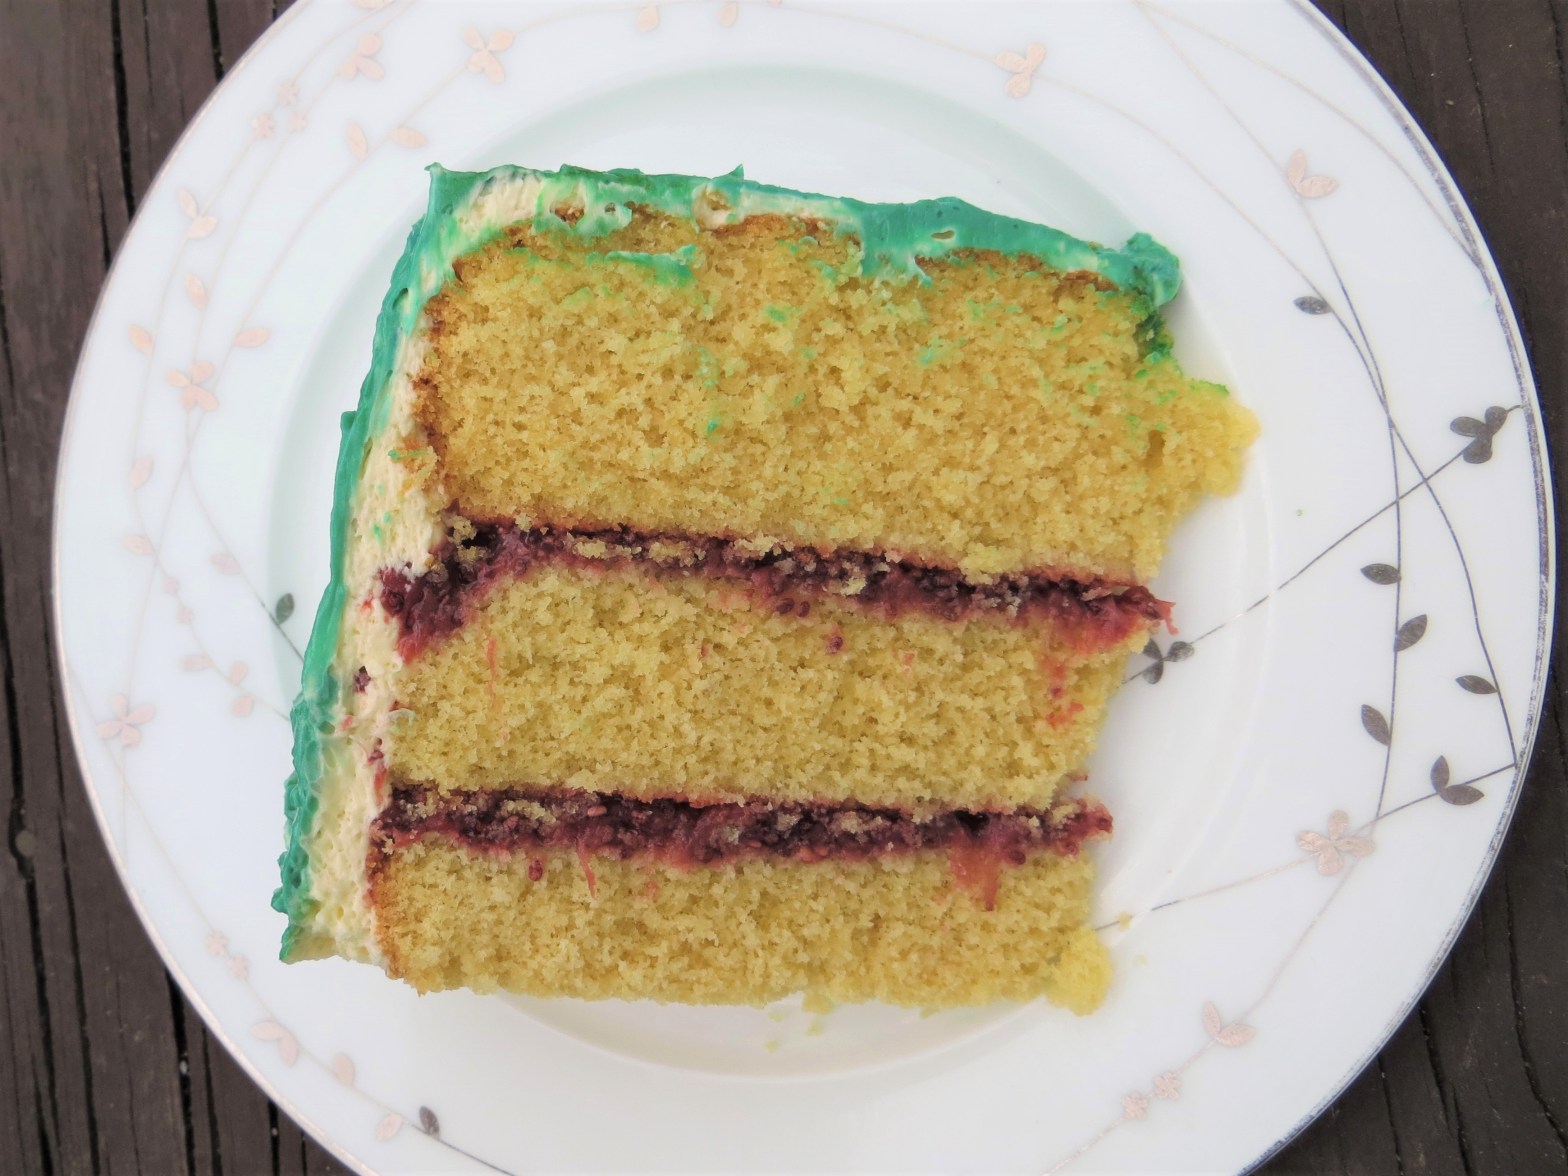
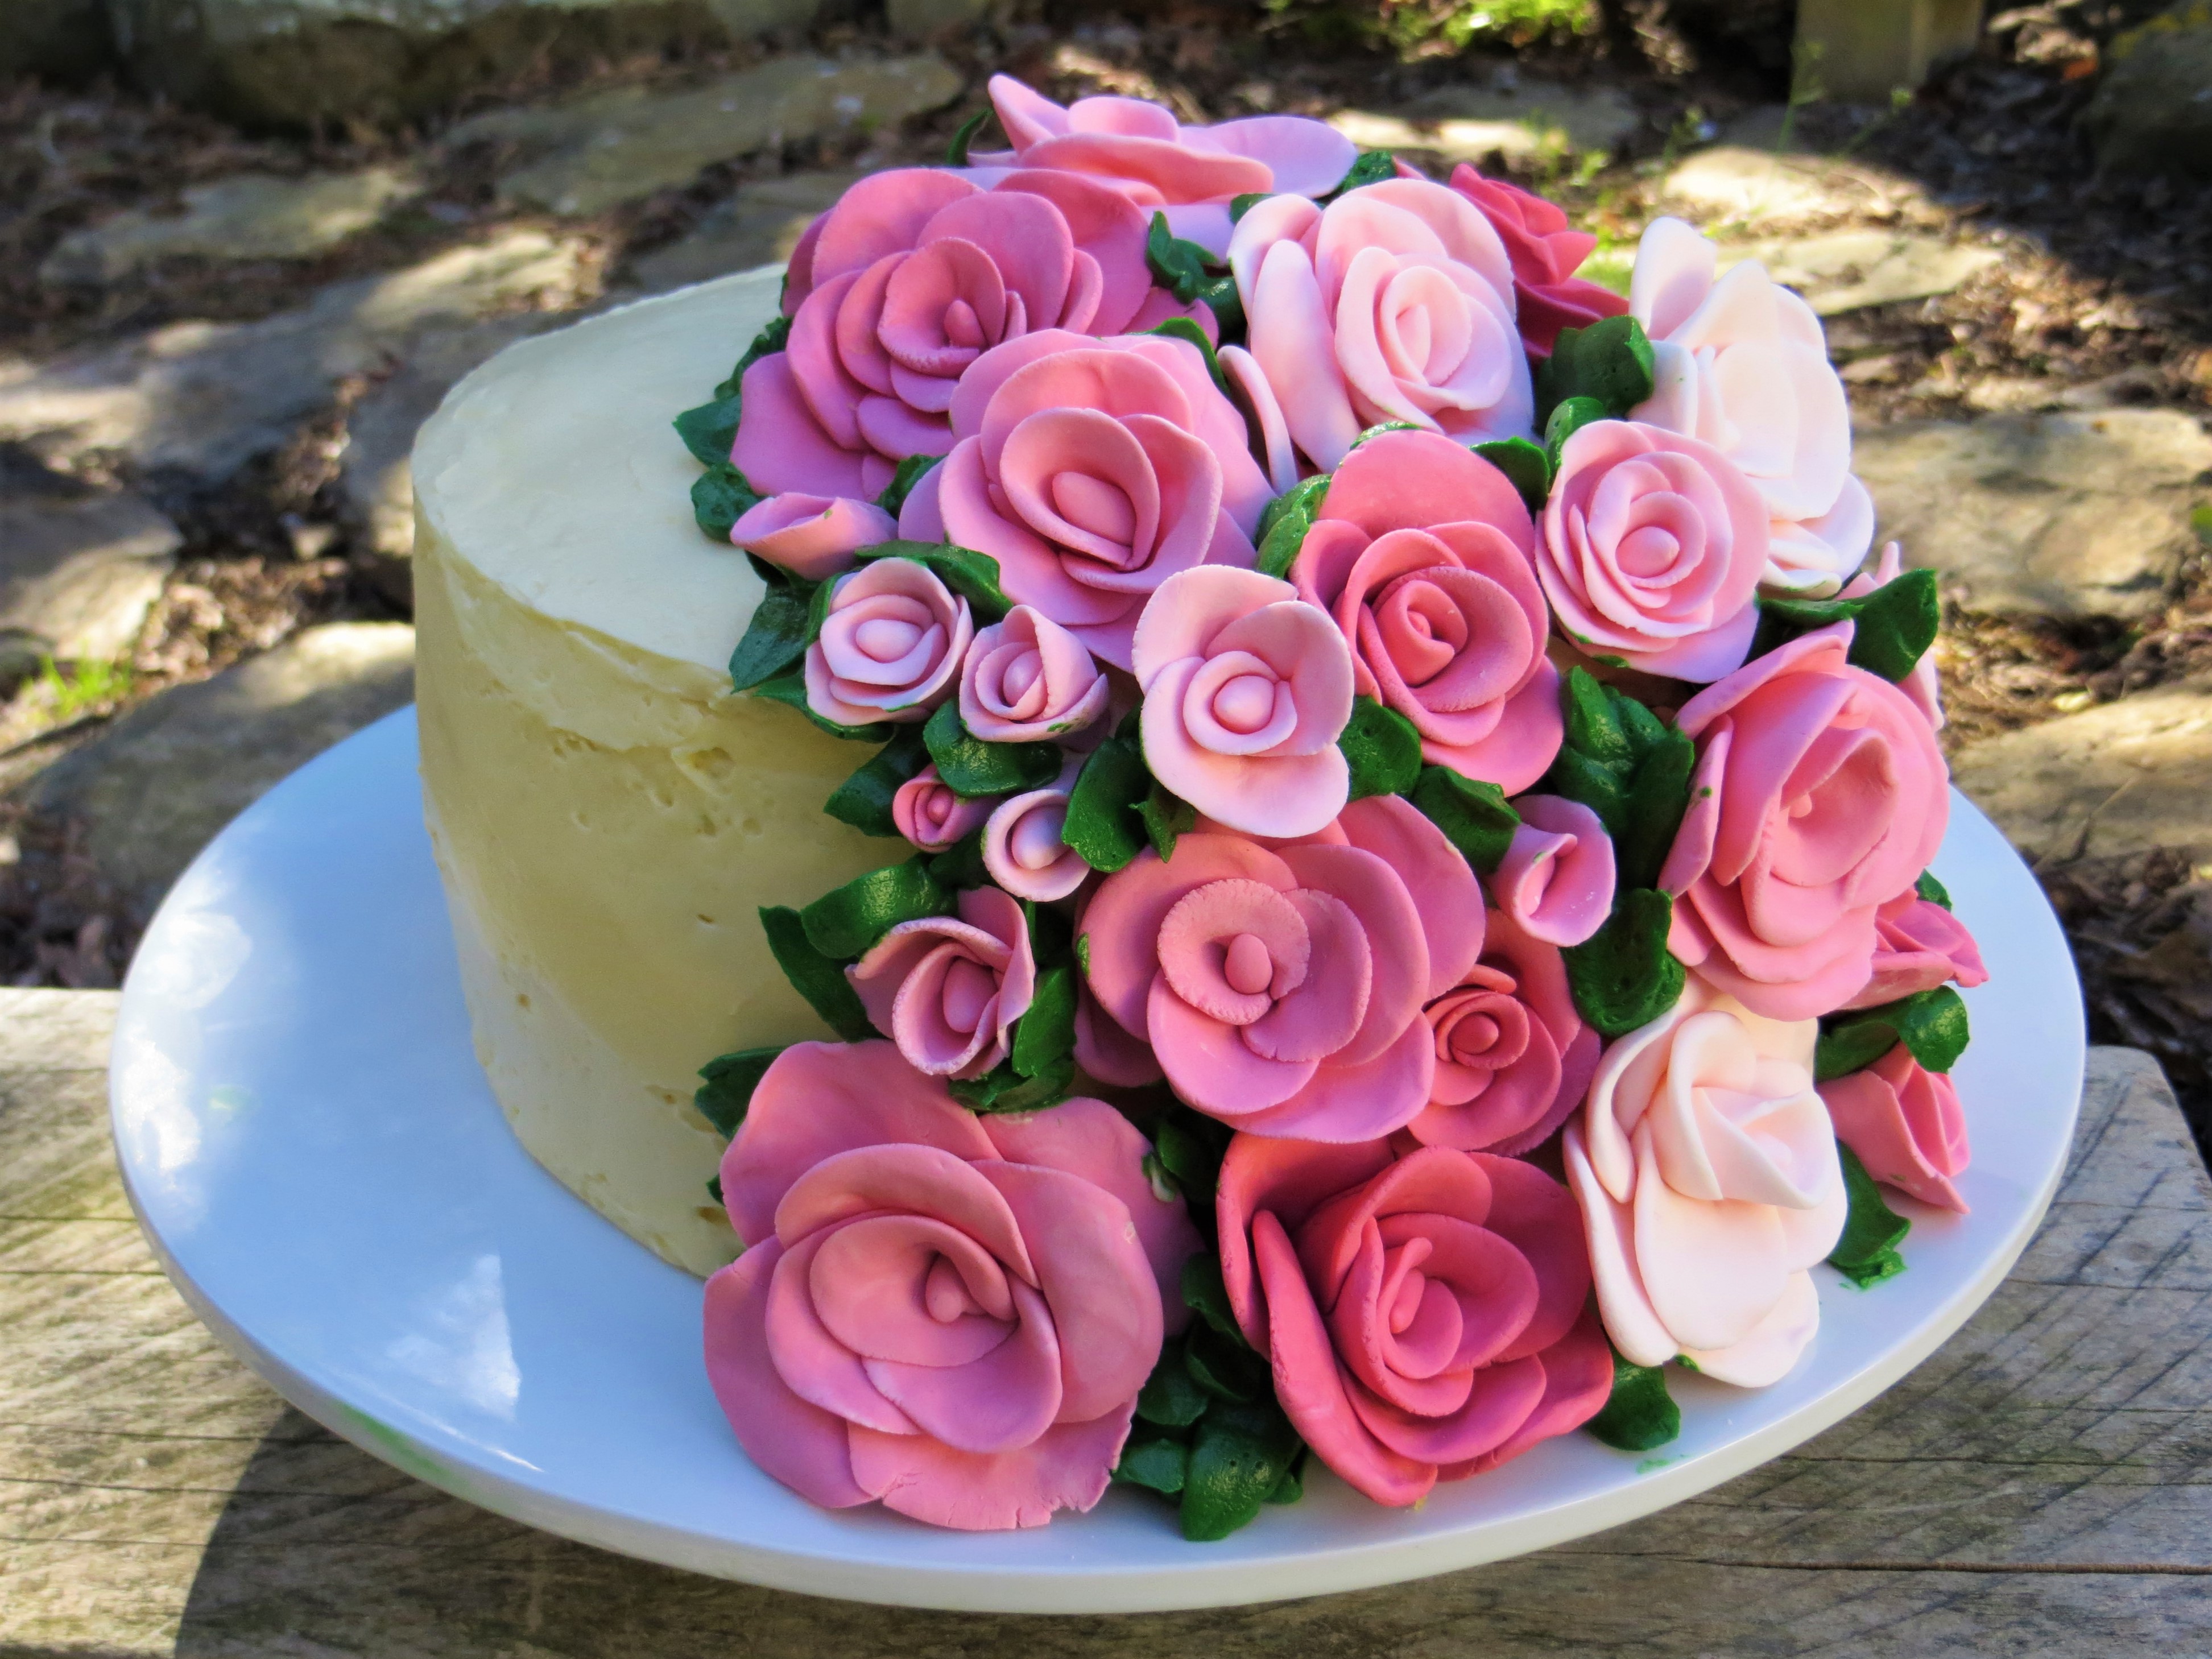
For the birthday cake, I made a three layer cake with this recipe. I sandwiched the layers together with strawberry jam and iced and decorated it with white chocolate icing (which I’ll try post on here soon!) and fondant roses. I have subsequently also halved it to make 30 mini cupcakes. You could also halve it to make a high single layer cake or some regular-size cupcakes – just adjust the baking time and keep an eye on the cake when you think it should be done. As usual the cup measurements are based on a 250 ml cup as equal to one cup. If you only have one or two cake tins, just wash, re-grease and re-use them until all three layers are done – I baked my layers one at a time anyway.
What you need:
12 eggs
1 cup of brown sugar
1 cup of white sugar
2 tablespoons of vanilla essence
½ cup of mild oil (I used light olive oil)
1 cup of butter, melted
1 cup of potato starch
1 cup of tapioca starch
1 cup of brown rice flour
1 cup of white rice flour
2 tablespoons of baking powder
Generous pinch of salt
What to do:
1. Pre-heat the oven to 150°C and grease a cake tin thoroughly – I used a 20cm round tin. I greased the tins with butter only; however, to ensure the cake comes out of the tin easily (and if you are less lazy than me and therefore prepared to do a bit extra), you may want to line the bottom with baking paper as well.
2. With a stand mixer, or in a bowl with an electric hand mixer, beat the eggs for a minute or two and then add the sugars and vanilla essence and beat very well, until the mixture is light and frothy and significantly increased in volume.
3. Add the oil and melted butter to the eggs/sugar mixture and beat to incorporate thoroughly.
4. Add the starches, flours, baking powder and salt to the bowl (ideally sift them in, but I don’t feel right instructing that when I just dumped mine in because I keep forgetting to buy a sieve to replace the gluteny one I got rid of when I got my coeliac diagnosis (next bit in a quiet, slightly embarrassed voice) over a year ago). Carefully fold these dry ingredients into the mixture in the bowl.
5. Tip a third of the cake batter into a greased cake tin and bake in the middle of the pre-heated oven for 20 to 30 minutes until fully baked (I usually look at the colour, press the top to see if it springs back and sometimes do a skewer test to check for done-ness). As I mentioned above, I baked my cake layers one at a time, but if your oven is bigger than mine, you may fit more than one tin in at a time – in that case I just recommend making sure that the tins are not touching each other.
6. Once done, remove the cake from the oven and leave to cool in the tin for about 5 minutes, before removing from the tin (and removing the baking paper, if you used it) and leaving to cool thoroughly on a cooling rack.
7. Once cool, ice the cake, decorate it as you want and enjoy!